October 3, 2018
List of Blogs
|<
<
>
>|
|
|
Ah, October...What's a Gardener to do?
|
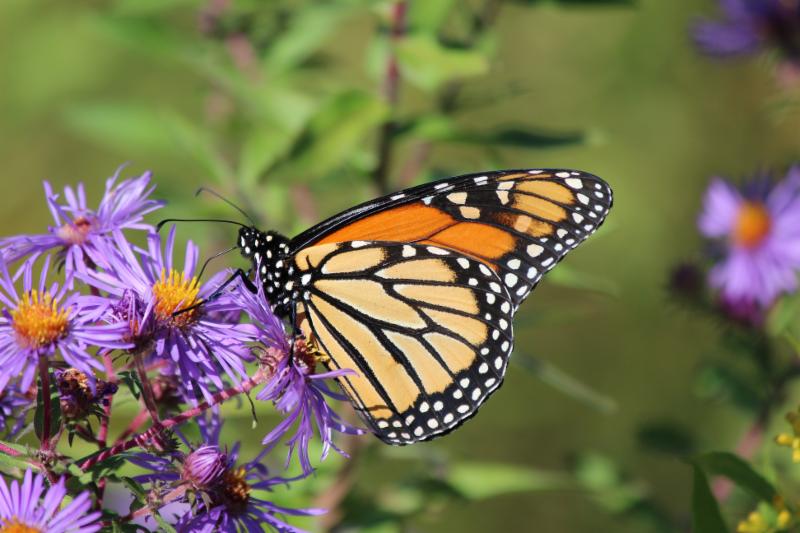
We've been seeing many Monarchs (Danaus plexippus)
emerging from their pupae and getting ready to head south. Most species of butterfly rely
on late-blooming natives like this New England Aster (Symphyotrichum novae-angliae)
as a food source going into the fall.
|
|
As much as we gardeners love summer, there's just something about fall. Maybe it has to do
with the trees beginning to change color, or the relief of summer's heat finally breaking,
or maybe it has more to do with watching the fall butterflies and native bees visit our
Asters, Goldenrods, and other fall flowering natives.
In some ways, it can even feel like a relief to put the gardens to bed for the year; maybe
you didn't quite get to do everything you meant to in your garden this year, but by now it
can feel sort of like a weight lifting to realize that you don't have to rush to get
anything done before the end of the year. Just do it in the spring! Not that there aren't
things to be done in the garden in the fall, though...
|
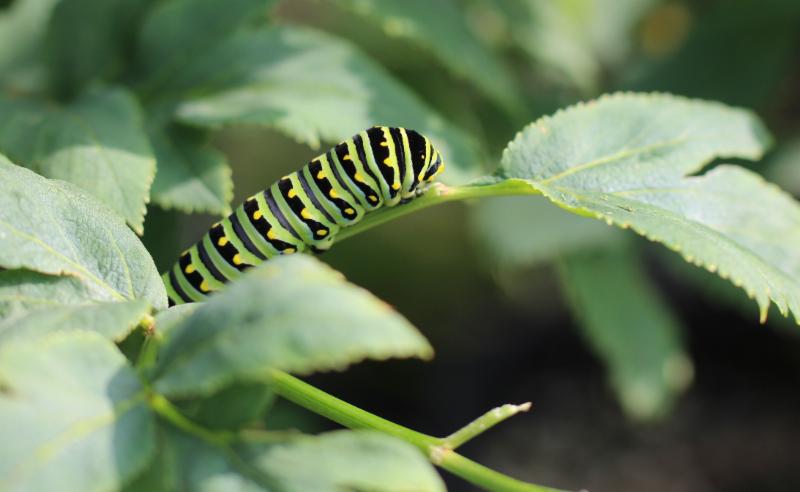
This Black Swallowtail (Papilio polyxenes)
feeding on Hairy Angelica (Angelica venenosa) will overwinter as an innocuous-looking
brown pupa attached to stems in your garden!
|
|
Cleaning up the Garden--Gently!
As soon as you let your attention turn from your garden (even for a moment!), it seems
that weeds start to creep back in from the edges. They can do this right up until the
very beginning of winter, so the first step in any fall garden cleaning is a vigorous
weeding, if you need one. With any luck, this will save you a bit of work in the spring.
Many gardeners take this a few steps further--they cut back any dead stems, rake out
fallen leaf duff, bag it all up and take it to the curb in a garbage bag. We've written
about this before, but please don't do that. Of course, we understand the appeal--create
a blank canvas for next year's garden, and make spring cleaning that much easier. But
there are a number of reasons that this method is a poor idea: first, many beneficial
and beautiful insects spend the winter sheltered right in your garden. Solitary bees
overwinter in hollow stems, and bumble bee queens overwinter in leaf duff, as do the
larvae of some butterfly species! Other
butterflies overwinter
as pupae attached to stems, spin leafy shelters for the caterpillars, or even spend
the winter as adults in sheltered locations. These are insects that we try to attract
to our gardens all summer--and unfortunately, if you remove all the stems and leaves
from your garden, you'll be removing them as well.
|
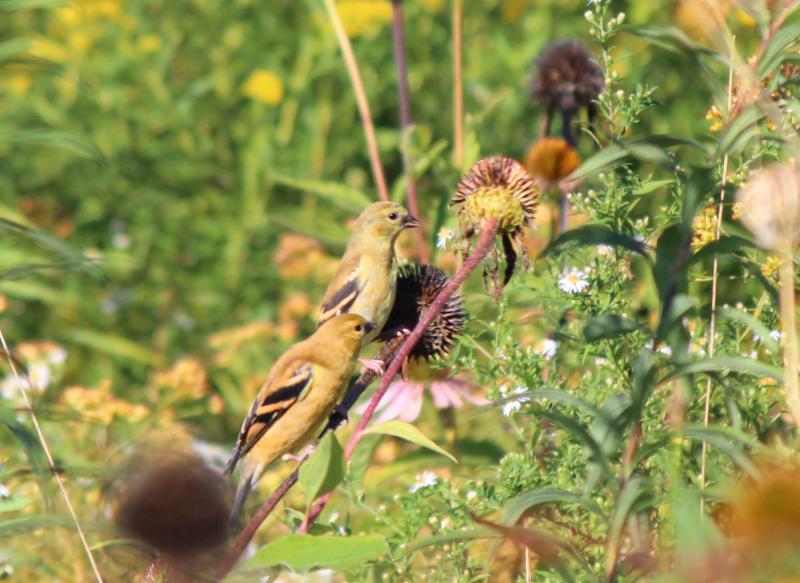
Many bird species also rely on standing seedheads as a
food source in the fall and winter, like these American Goldfinches (Spinus tristis),
which are enjoying the seeds of Purple Coneflowers (Echinacea purpurea).
|
|
Another reason not to clear your garden this way is that you're actually removing natural
fertilizer. Many gardeners spend a lot of time and effort (and often, money) to ensure that
their gardens have proper nutrients present in the soil. Leaf duff is an unappreciated form
of both compost and mulch; why remove it and replace it with a synthetic substitute?
|
|
And finally, placing compostable materials into plastic and having them removed to a
landfill is a problem for more than just the insects that have been caught up in
the process. Increasingly, scientists are talking about the
problems with microplastics, which are a
form of plastic
that exists as small particles and pollute the environment.
Not much is known about the long-term environmental consequences of microplastics yet,
but they are extremely common in aquatic environments, partly due to runoff. Because
they are so small (anywhere from 5 mm to microscopic), they cannot be effectively
cleaned up, and can be extensively ingested by wildlife. A lot of microplastic comes
from the breaking down of larger plastics (like garbage bags), so it's a good idea to
avoid using plastic where you can. Since the removal of leaf duff is an unnecessary
process (as a compostable, it will break down on its own if simply left in place or
moved to a leaf or brush pile), this is one of the cases where the use of plastic is
definitely unnecessary; why fill up our landfills with leaves and sticks to begin with?
|
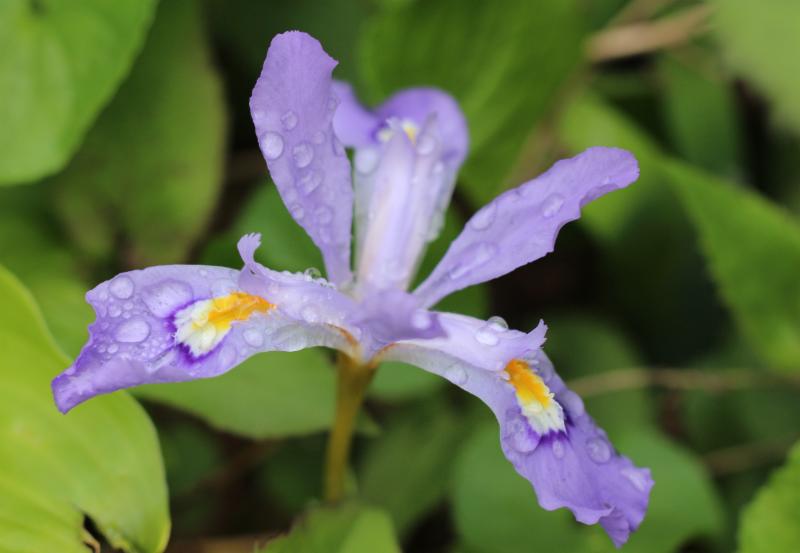
Early-flowering plants like this
Dwarf Crested Iris (Iris cristata) particularly appreciate being planted in the
fall so that they've settled in by the time they get ready to bloom in the spring.
|
|
Spring Plantings
Of course, everyone wants to do something to get their gardens ready for next spring, and who
can blame us; we're gardeners! Most of us aren't quite ready to 'let the garden go' all fall
and winter, and there are many beneficial things you can do to get your garden ready for next
year. If you enjoy working with bulbs, you're already familiar with the satisfaction that
comes with putting in clever little plantings in the fall, and watching your new plants take
off with beautiful colors in the spring. As we've mentioned before, perennials are equally
well-suited to fall planting, and by the time you find yourself tired of winter, it can be
especially enjoyable to see those fresh new sprouts and flowers pushing out of the recently-frozen
soil. Spring-blooming plants like Wild Eastern Columbine (Aquilegia canadensis),
Wild Stonecrop (Sedum ternatum), and Twoleaf Miterwort (Mitella diphyllum) are especially
welcome and beautiful after the chill of the winter. We ourselves are particularly fond of
watching the progression of Violet (Viola sp.) blooms throughout the spring; much like the
ever-popular crocuses (which are native everywhere from the Middle East to Europe to China,
but not here), violets add beautiful little flashes of color (anything from purple to white
to magenta to yellow) throughout a garden first thing in the spring. Violets also can make a
beautiful groundcover for your garden all season long, acting even more effectively than mulch
as a way to keep moisture up and weeds down!
|
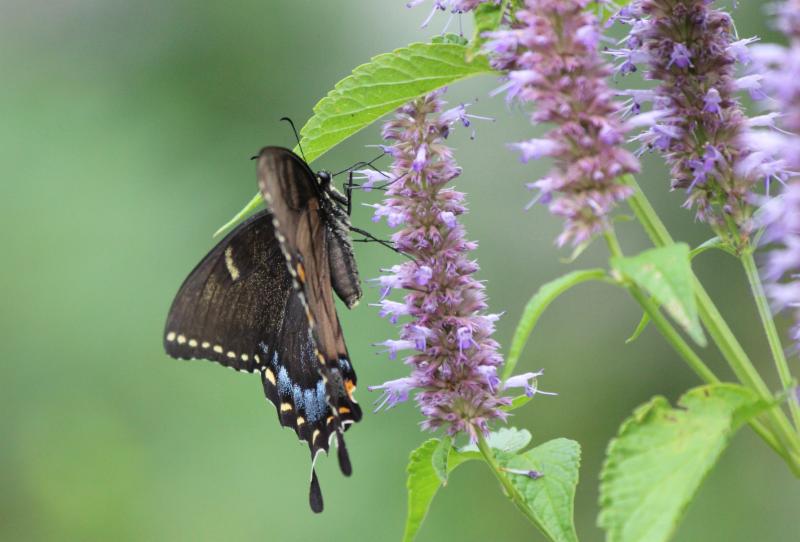
Purple Giant Hyssop (Agastache scrophulariifolia)
blooms in the summer, and is a particular favorite of butterflies like this female (dark form)
Tiger Swallowtail (Papilio glaucus). And like many perennials, it will grow readily from
seed or transplants.
|
|
Jump-Starting Next Year's Garden for the Whole Season
Spring-flowering perennials aren't the only ones that benefit from having the fall and
winter to settle into their new homes. There's no reason you can't also plant Milkweeds
(Asclepias sp.), which are notoriously shy in the spring (they sprout later than
most plants, as a way of avoiding frost entirely), or Cardinal Flowers (Lobelia cardinalis),
Elephant's Foot (Elephantopus carolinianus), Nodding Onion (Allium cernuum), or
Halberd-leaved Rose Mallow (Hibiscus laevis)--any number of excellent perennials that
will enhance your gardens. Fall is an excellent opportunity to get a big head start on next
summer, so that you can save yourself the slightly frantic effort that comes from trying to
plant for each season as that season arrives!
Fall is also a good time for sowing native plants seeds. Most perennial seeds require
a period of cold stratification (cold and moist conditions) before they will sprout.
You can simulate these winter conditions with a sealed plastic bag and some moist
soil in your refrigerator, but once again, nature knows what it's doing; why
synthesize what happens naturally, when you have natural conditions readily
available? Simply sow the seeds in an appropriate location, and let nature do its
job. We have some
helpful seed germination tips on our website.
|

Obviously, heaving is neither ideal for the health
of your transplants nor for the beauty of your garden.
|
|
Some Helpful Planting Tricks
If you're planting in the fall, how do you keep your
plant from "heaving" over the winter? Heaving, as you probably already know,
is a result of the natural freeze-thaw cycle of the ground during the winter.
The result is a transplant that seems to have been rejected from where you
have planted it, the shape of its pot still visible and forced upwards out
of the ground like a cork being pushed from a bottle--luckily, this is a
reasonably easy thing to avoid by simply planting things correctly!
|
|
Successful Fall Planting 101:
Always dig more hole than you think you need (at least twice as deep and twice as wide).
As I was told many years ago, "always dig a twenty dollar hole for a ten dollar plant."
Then, backfill the hole with the disturbed soil, and slightly break up the root ball of your
new plant before planting it. This gives your plant the best possible chance of having its
roots expand into the surrounding soil. Next, make sure that your plant is even with the
level of the soil: once you water it in, it should neither be in a mound above the surface
of the ground, nor should it be in a depression. Finally, when planting in the fall,
use a thin layer of mulch to cover the area around your new plant: this will help to insulate
the ground slightly and decrease the number of freeze-thaw cycles acting on the ground around
your plant. These are good basic steps to follow whenever you're planting a new plant, but the
reason heaving occurs in the first place is because the undisturbed ground around the transplant
expands into recently-disturbed areas when the soil freezes (because water expands when it
becomes ice). Each time the ground thaws and then freezes, this happens all over again, and
pushes the compacted soil of the root ball (and your plant with it!) a little further out of
the ground. By giving your plant an extra-large area of disturbed ground around it, breaking up
the compacted soil (root ball) from the plant's original pot (thereby giving the plant's roots
a chance to expand into the soil), and using a thin blanket of mulch to help moderate soil
temperature fluctuations, you will avoid this problem!
|
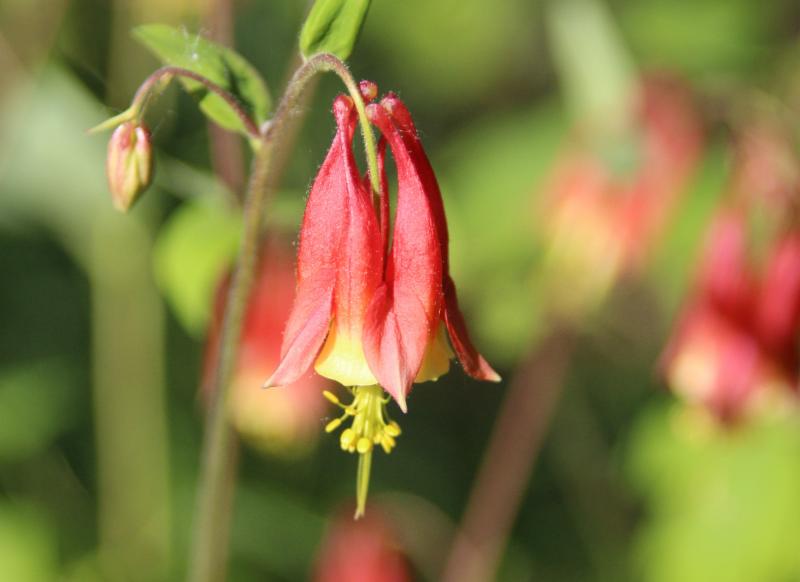
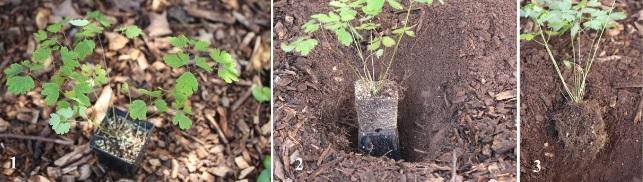
Below, we've made a step-by-step of this planting process
featuring a Wild Eastern Columbine (Aquilegia canadensis), one of our favorite spring blooms.
|
|
Step 1: Choose a location with conditions suitable for your new plant.
Step 2: Make sure to dig a hole twice as deep and wide as you need.
Step 3: Be sure to break up the root ball before planting
|
|
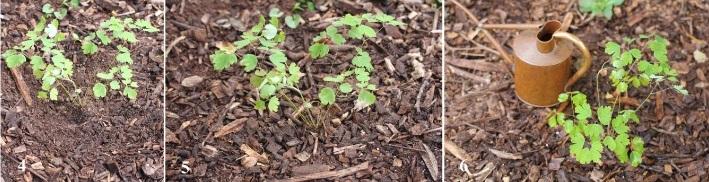
Step 4: Start to backfill the hole with the loosened soil, as shown. Once
the hole is completely backfilled, no potting soil should show above ground
(but don't bury your plant more deeply than it was in the pot!).
Step 5: Cover the area with a thin layer of mulch, making sure that you have not
created either a mound or a depression around the transplant.
Step 6 (last one!): Water in thoroughly, and enjoy your new plant!
|
|
|